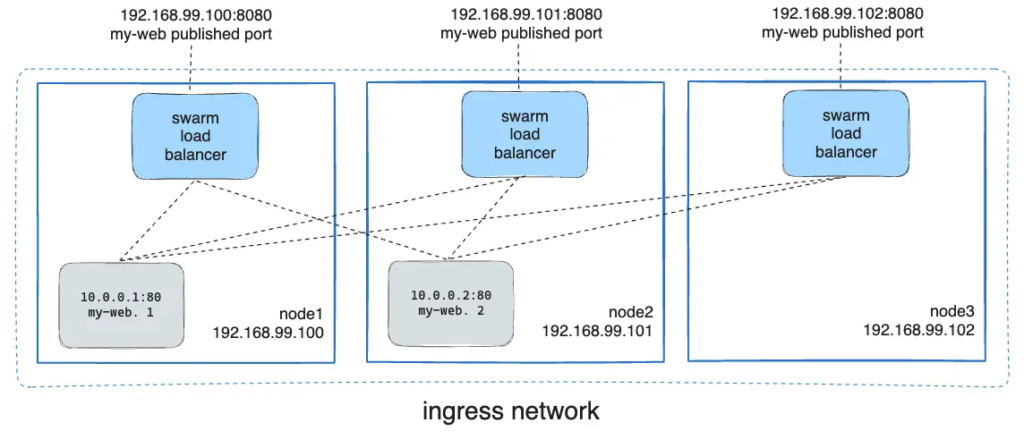
You can publish a port for an existing service using the following command:

```console
$ docker service update \
  --publish-add published=<PUBLISHED-PORT>,target=<CONTAINER-PORT> \
  <SERVICE>
```

You can use `docker service inspect` to view the service's published port. For
instance:


```console
$ docker service inspect --format="{{json .Endpoint.Spec.Ports}}" my-web

[{"Protocol":"tcp","TargetPort":80,"PublishedPort":8080}]
```


The output shows the `<CONTAINER-PORT>` (labeled `TargetPort`) from the containers and the
`<PUBLISHED-PORT>` (labeled `PublishedPort`) where nodes listen for requests for the service.

### Publish a port for TCP only or UDP only

By default, when you publish a port, it is a TCP port. You can
specifically publish a UDP port instead of or in addition to a TCP port. When
you publish both TCP and UDP ports, if you omit the protocol specifier,
the port is published as a TCP port. If you use the longer syntax (recommended),
set the `protocol` key to either `tcp` or `udp`.

#### TCP only

Long syntax:

```console
$ docker service create --name dns-cache \
  --publish published=53,target=53 \
  dns-cache
```

Short syntax:

```console
$ docker service create --name dns-cache \
  -p 53:53 \
  dns-cache
```

#### TCP and UDP

Long syntax:

```console
$ docker service create --name dns-cache \
  --publish published=53,target=53 \
  --publish published=53,target=53,protocol=udp \
  dns-cache
```

Short syntax:

```console
$ docker service create --name dns-cache \
  -p 53:53 \
  -p 53:53/udp \
  dns-cache
```

#### UDP only

Long syntax:

```console
$ docker service create --name dns-cache \
  --publish published=53,target=53,protocol=udp \
  dns-cache
```

Short syntax:

```console
$ docker service create --name dns-cache \
  -p 53:53/udp \
  dns-cache
```

## Bypass the routing mesh

By default, swarm services which publish ports do so using the routing mesh.
When you connect to a published port on any swarm node (whether it is running a
given service or not), you are redirected to a worker which is running that