6th chunk of `content/manuals/desktop/troubleshoot-and-support/troubleshoot/topics.md`
58af2caedfc5ea634a85cdd4e2329d1996d15d3ceb205a9100000001000006eb
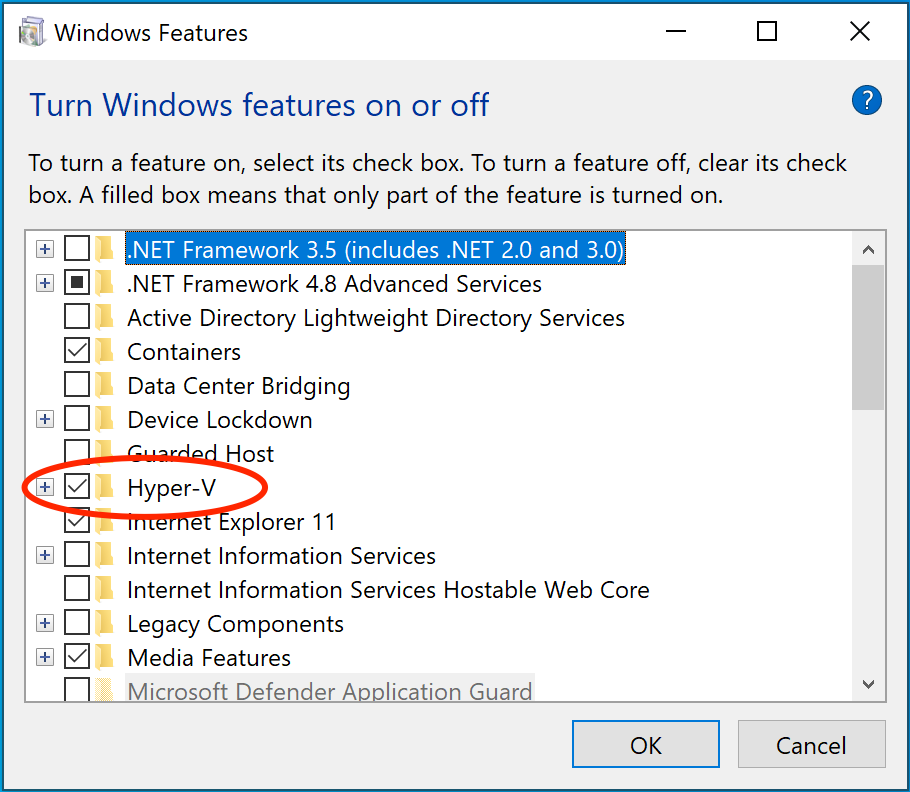
Docker Desktop requires Hyper-V as well as the Hyper-V Module for Windows
PowerShell to be installed and enabled. The Docker Desktop installer enables
it for you.
Docker Desktop also needs two CPU hardware features to use Hyper-V: Virtualization and Second Level Address Translation (SLAT), which is also called Rapid Virtualization Indexing (RVI). On some systems, Virtualization must be enabled in the BIOS. The steps required are vendor-specific, but typically the BIOS option is called `Virtualization Technology (VTx)` or something similar. Run the command `systeminfo` to check all required Hyper-V features. See [Pre-requisites for Hyper-V on Windows 10](https://docs.microsoft.com/en-us/virtualization/hyper-v-on-windows/reference/hyper-v-requirements) for more details.
To install Hyper-V manually, see [Install Hyper-V on Windows 10](https://msdn.microsoft.com/en-us/virtualization/hyperv_on_windows/quick_start/walkthrough_install). A reboot is *required* after installation. If you install Hyper-V without rebooting, Docker Desktop does not work correctly.
From the start menu, type **Turn Windows features on or off** and press enter.
In the subsequent screen, verify that Hyper-V is enabled.
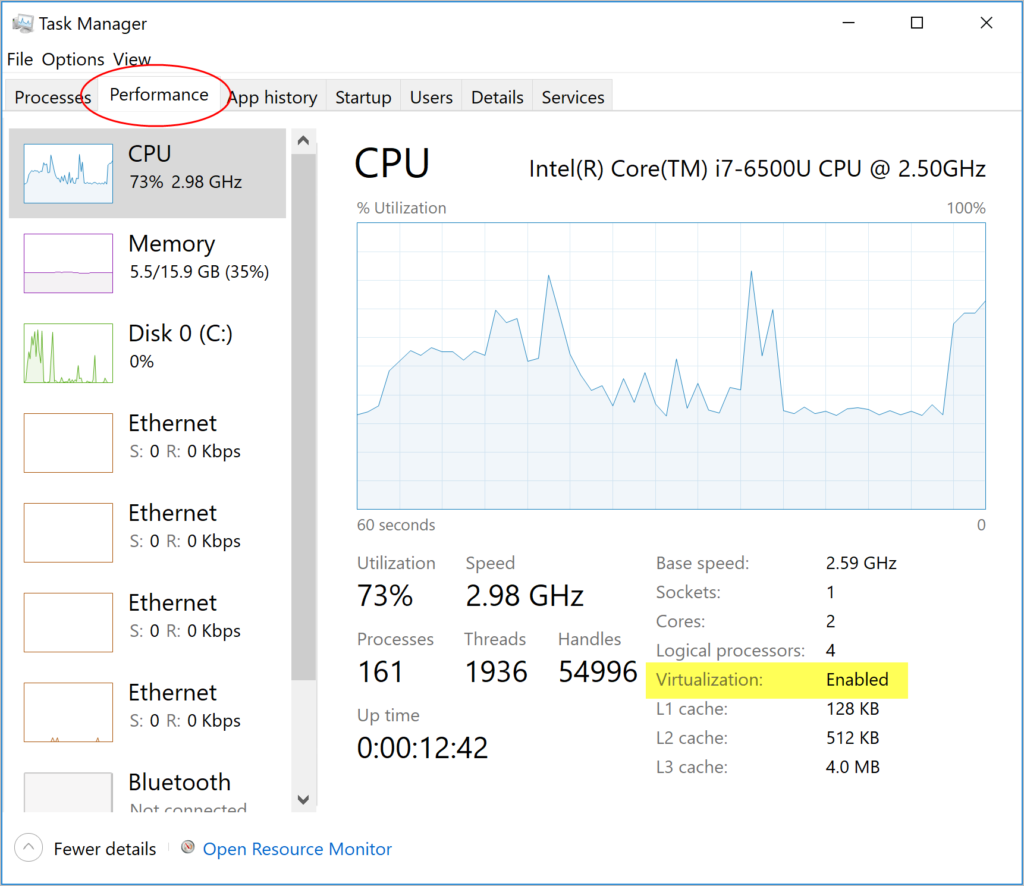
##### Virtualization must be turned on
In addition to [Hyper-V](#hyper-v) or [WSL 2](/manuals/desktop/features/wsl/_index.md), virtualization must be turned on. Check the
Performance tab on the Task Manager. Alternatively, you can type `systeminfo` into your terminal. If you see `Hyper-V Requirements: A hypervisor has been detected. Features required for Hyper-V will not be displayed`, then virtualization is enabled.