The `.env` file located in the backend/ directory already contains placeholder credentials and configuration values that LocalStack uses to emulate AWS services. The `AWS_ACCESS_KEY_ID` and `AWS_SECRET_ACCESS_KEY` are placeholder credentials, while `S3_BUCKET_NAME` and `S3_ENDPOINT_URL` are configuration settings. No changes are needed as these values are already correctly set for LocalStack.
> [!TIP]
>
> Given that you’re running Mongo in a Docker container and the backend Node app is running natively on your host, ensure that `MONGODB_URI=mongodb://localhost:27017/todos` is set in your `.env` file.
```plaintext
MONGODB_URI=mongodb://localhost:27017/todos
AWS_ACCESS_KEY_ID=test
AWS_SECRET_ACCESS_KEY=test
S3_BUCKET_NAME=mysamplebucket
S3_ENDPOINT_URL=http://localhost:4566
AWS_REGION=us-east-1
```
While the AWS SDK might typically use environment variables starting with `AWS_`, this specific application directly references the following `S3_*` variables in the index.js file (under the `backend/` directory) to configure the S3Client.
```js
const s3 = new S3Client({
endpoint: process.env.S3_ENDPOINT_URL, // Use the provided endpoint or fallback to defaults
credentials: {
accessKeyId: process.env.AWS_ACCESS_KEY_ID || 'default_access_key', // Default values for development
secretAccessKey: process.env.AWS_SECRET_ACCESS_KEY || 'default_secret_key',
},
});
```
4. Start the backend server:
```console
$ node index.js
```
You will see the message that the backend service has successfully started at port 5000.
## Start the frontend service
To start the frontend service, open a new terminal and follow these steps:
1. Navigate to the `frontend` directory:
```console
$ cd frontend
```
2. Install the required dependencies
```console
$ npm install
```
3. Start the frontend service
```console
$ npm run dev
```
By now, you should see the following message:
```console
VITE v5.4.2 ready in 110 ms
➜ Local: http://localhost:5173/
➜ Network: use --host to expose
➜ press h + enter to show help
```
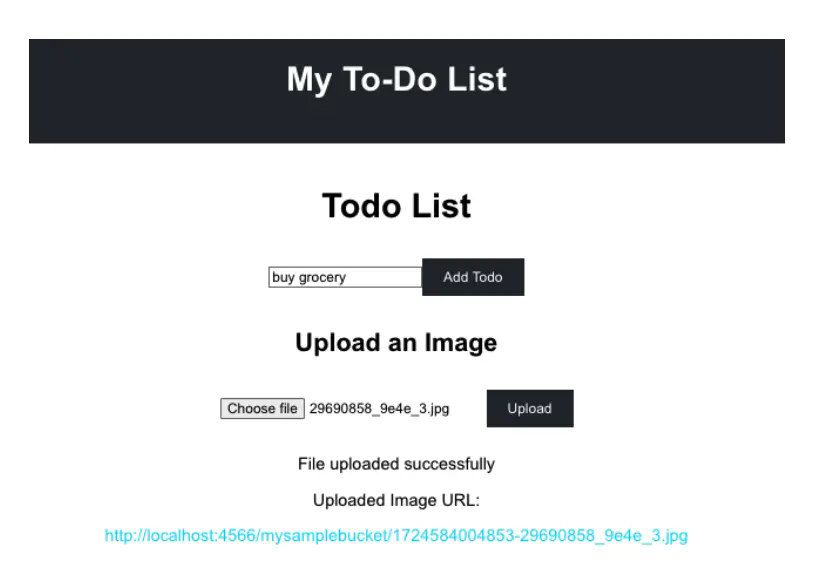
You can now access the app via [http://localhost:5173](http://localhost:5173). Go ahead, and upload an image by choosing an image file and clicking the **Upload** button.